Friday, October 29, 2010

Unofficial sloodleset 1.1 iar for Opensim

 This is a sloodleset1.1 for developers and testers of Sloodle in Opensim. Please DO NOT send bug reports to the sloodle developers about this sloodleset. Post your comments here instead and I'll try to address them as best I can.

I am sharing this in the hope that it helps the development of Sloodle in Opensim.

This sloodleset1.1 is based on a comparison of Fumikazu Iseki's mod of sloodleset 1.0 and the sloodleset1.1 at Sloodle Island. The forum discussion on Fumi.Iseki's sloodleset 1.0 is at http://www.sloodle.org/moodle/mod/forum/discuss.php?d=2855.

How was it made?

I simply exported all the scripts in the Sloodle Island sloodleset1.1 and compared it with all the scripts in Fumi.Iseki's sloodleset1.0. Comparison was done with the Meld Diff Viewer which highlights differences in a side-by-side comparison.

Then I determine whether to update a script to 1.1 or retain Fumi.Iseki's mod. There is no modification of the textures, sounds and mesh. Except for the RegEnroll Booth which had the additional box object for hover text.

As of this post I have not tested all the sloodle objects yet. Please post a comment if you test this, on what works and what does not work.

Evaluation

Note that any reference to line numbers below are based on gedit which starts with 1 rather than 0.


Objects with Changes

Main Concern: WebIntercom

Changed Files:
  • sloodle_translation_webintercom_en
  • sloodle_mod_chat-1.0

Note: I have not retained the mod code in sloodle_mod_chat-1.0 by Fumi.Iseki because I cannot determine how to insert it in the new code. I replaced it with the 1.1 code. Please help evaluate and check this if it works.


RegEnrol Booth

Changed files:
  • sloodle_mod_regbooth-1.0
  • sloodle_setup_notecard

Note: The green hover text that says "Touch me to start web configuration" appears to no longer display.

Added:
  • hovertext box object
  • _setText script

    Vending Machine

    Changed files:
    • sloodle_translation_distributor
    • sloodle_mod_distributor-1.0


    Removed:
    • SLOODLE 1.0 Vending Machine (Rev 1) README


      Presenter

      Changed files:
      • modified: sloodle_mod_presenter-2.0
      • sloodle_translation_presenter_en

        Toolbar Giver


        Changed file:
        • get a toolbar


          Objects without Changes


          Quiz Pile-On

          Note:  The following lines are not in Sloodle Island sloodleset1.1. It is not identified as "for OpenSim" in sloodleset1.0 but the file is listed as modified by Fumikazu Iseki in the forum above. I have decided to retain the 1.0 script. Please check.


          Retained 1.0 script:
          • sloodle_quiz_pile_on_choice
          line 46:         llSetStatus(STATUS_PHANTOM, FALSE);
          line 57:         llSetStatus(STATUS_PHANTOM, TRUE);


          Lite Toolbar

          • Retained script: sloodle_toolbar_menu_lite

          Note:  Lines 106, 107, 130, and 138 do not exist in 1.1 and not identified "for OpenSim". It is identified by Fumikazu Iseki as a mod file for OS in the forum above. Please check.

          The following objects are retained without modification except changing the name to 1.1.
          • Sloodle Set (cellphone look alike main object)
          • PrimDrop
          • Quiz Chair
          • Choice (Horizontal)
          • Choice (Vertical)
          • LoginZone
          • MetaGloss
          • Password Reset
          • PictureGloss
          • Toolbar (Full)


          If there is anything that I missed please inform me by leaving a comment here.

          Download:

          http://www.mediafire.com/file/ejatscehdfiyaep/sloodleset1.1_unofficial.iar (2.29 MB)

          Sloodle Forum tread: http://www.sloodle.org/moodle/mod/forum/discuss.php?d=3314

          Thursday, October 28, 2010

          Bahay kubo prim object

          Everyone please sing the pinakbet song Bahay Kubo (Nipa Hut).


          Downloads:

          http://www.mediafire.com/file/wd344i9a9s41i8g/kubo.iar (425 KB)

          http://www.mediafire.com/file/j44ca4wugko46am/kuboXML.zip (470.57 KB)


          Copyright Roel Cantada 2010


          Wednesday, October 27, 2010

          Unfurnished bahay na bato prim object

          This is a 544 prim bahay na bato.

          Downloads:

          http://www.mediafire.com/file/em1s2cgfem6v2ed/bahaynabato.iar (1.03 MB )

          http://www.mediafire.com/file/1aysktd7uoms4jc/bnbXML.zip (1 MB )


          Copyright Roel Cantada 2010


          comedor

          azotea

          sala

          a cuarto

          antesala

          cocheria and cuadra


          back

          west side

          front

          east side


          Sunday, October 24, 2010

          Monkey mesh complete

          I finally finished my monkey mesh. I would need to give it fur and materials later.


          Thursday, October 21, 2010

          Update on matsing (monkey) head

          While working with sculpties in Blender I thought I update my matsing character in Blender 2.5. This use dummy materials for editing purposes.

          A frustrating Opensim bug

          This probably the most frustrating bug in Opensim. There are times when I "Edit linked parts" the part just fly off in the distance, beyond the sim and I can't delete it. When I hit undo sometimes the other parts join the one that flew away. Grrrr.... I can locate the rogue prim object with Imprudence's Advanced-Area Object Search but it does not display asset id or have the ability to delete or take the object from the list.


          I wish someone could solve this problem.

          Beginning 2nd floor of bahay na bato


          The bahay na bato is real slow to build ....


          a sculpty balustrade

          Wednesday, October 20, 2010

          Sculptie Shapes for the Primstar Library

          Here are four basic shapes that may be useful for people creating prim sculpties with Blender/Primstar. They are 32x32 with subdivision 0. I find them useful when creating shapes that need a lot of geometry on two dimensions only and no visible insides.


          Download


          http://www.mediafire.com/file/ej527x89wo7921o/myPRIMS.zip  (26.77 KB)

          Download and extract. Copy the folder to the primstar library folder which is usually ~/.blender/scripts/primstar/library/
          You can rename the folder and the files with something you can remember. They will appear in the list of shapes in primstar.

          Monday, October 18, 2010

          Beggining bahay na bato prim object

          I am currently working on a bahay na bato. I'm still in the first floor as shown below.

          Saturday, October 16, 2010

          How to compile VTBuilder in Ubuntu Lucid

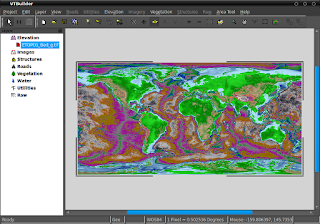
          VTBuilder with ETOPO data on Ubuntu Lucid


          I use VTBuilder as a GIS data converter and preprocessor for creating terrain for OpenSim. Unfortunately there is not Ubuntu package for it and I had to use the windows version. I really don't like to move to another computer or reboot in the middle of a creative experience so I want VTBuilder in my Ubuntu box. But the "General Unix Build Instructions for the VTP Software" at http://www.vterrain.org/Distrib/unix_build.html did not work for my Ubuntu Lucid. So after two sleepless nights I was able to hack the makefiles and successfully ran VTBuilder in Lucid. I still do not know how stable this is or what will work and not work.

          Warning: The following information is for people who knows how to compile software from source files in Ubuntu GNU/Linux. It is for an amd64 flavor only. I have not tested it on a 32 bit flavor and anyone wanting to do so, may need to modify the Make.defs file in the vtp4lucid files I've included in this post.

          I assume you have an amd64 Ubuntu Lucid box with all the developer files for compiling software e.g. gcc, make, patch, x11proto dev files, etc.

          **Files needed**


          Source code of the Virtual Terrain Project (VTP) http://www.vterrain.org/
          VTBuilder is a tool in this suite.

          Get it via svn from http://code.google.com/p/vtp/source/checkout

          **Dependencies**

          Most of the dependencies are in the repositories. Issue the following:

          sudo apt-get install openscenegraph openscenegraph56 libgdal1-1.6.0 
          libgdal1-dev libproj-dev proj proj-data zlib1g-dev zlib1g-dbg netcdf-bin 
          libnetcdf-dev libnetcdf4 netcdf-dbg tcsh libwxgtk2.8-0 libwxgtk2.8-dev 
          libwxgtk2.8-dbg bzip2 libbz2-dev libbz2-1.0 libtiff4-dev  libpng12-0 
          libpng12-dev libjpeg62-dbg libjpeg62 libjpeg62-dev libglut3-dev libglut3 
          freeglut3 freeglut3-dev freeglut3-dbg glutg3 glutg3-dev libcurl3-gnutls 
          libcurl4-gnutls-dev

          I may be missing something so check again if errors are encountered during compilation. Some of these files may not be needed but I really do not know, so I probably included more than necessary.

          There are three libraries not in the repositories that needs to be built first. These are squish, libMini and Quikgrid. I failed to compile quikgrid so it is not included here.

          **Squish**

          Fortunately there is a ppa of the squish libraries here https://launchpad.net/~kervala/+archive/ppa. The list of files needed are the following.

          libsquish1_1.10.26~lucid0_amd64.deb
          libsquish-dev_1.10.26~lucid0_amd64.deb
          libsquish1-dbg_1.10.26~lucid0_amd64.deb
          squish-extra-dbg_1.10.26~lucid0_amd64.deb
          squish-extra_1.10.26~lucid0_amd64.deb

          I have included this in the vtp4lucid tools below. Install them with Gdebi starting with libsquish1_1.10.26~lucid0_amd64.deb. Or cd to the folder where you extracted the deb files and issue the following command in a terminal:

          sudo dpkg -i *.deb

          **LibMini**

          The Mini library source code can be downloaded here http://stereofx.org/download. I also included this in the vtp4lucid tools. It's very easy to build and install. You will need tcsh for this one.

          1. Open a terminal (it would be bash)
          2. type tcsh (you're now in tcsh)
          3. cd to the mini source code folder
          4. issue the following command

          sudo ./build.sh install

          It will install the following:

          /usr/local/lib/libMini.a
          /usr/local/include/mini  folder
          /usr/share/mini folder
          

          5. type exit and you will be back in bash

          **VTP4Lucid tools**

          Download: http://www.mediafire.com/file/enb4ioqdgnxq6dc/vtp4lucid.tar.gz (2.76 MB)

          Download the modified makefiles and other needed files including mini and squish at . Extract in your vtp folder. It should replace Make.defs in the root of the vtp folder and Makefiles in the TerrainApps folder. It will also put Data/Culture and Data/WorldMap folders in TerrainApps. These are needed by VTBuilder but not included in the source code.

          The Makefiles were modified by changing lgdal to lgdal1.6.0 because it could not find the gdal library in Lucid. The Make.defs file library paths were modified for Lucid.


          **Building VTP**

          A. Compiling TerrainSDK

          1. open a terminal and issue the following commands

          export GDAL_DATA=/usr/share/gdal16
          export PROJ_LIB=/usr/share/proj
          

          2. cd to TerrainSDK folder
          3. type

          sudo make install
          

          it will install libraries and header files in /usr/local/lib and /usr/local/include respectively

          4. after it successfully compiled issue the following commands in the terminal

          sudo export LD_LIBRARY_PATH=/usr/local/lib:/home/dilis/OPT/vtp/TerrainSDK/vtdata:/home/dilis/OPT/vtp/TerrainSDK/vtlib/vtosg:/home/dilis/OPT/vtp/TerrainSDK/xmlhelper:/home/dilis/OPT/vtp/TerrainSDK/vtui:/home/dilis/OPT/vtp/TerrainSDK/unzip:/home/dilis/OPT/vtp/TerrainSDK/minidata
          

          Make sure to replace the path of TerrainSDK above with your setup. There is a need to make the environment variables persistent but I forgot how :-( while doing this build. This may help https://help.ubuntu.com/community/EnvironmentVariables#System-wide%20environment%20variables.


          B. Building VTBuilder

          You may build VTBuilder alone or the entire VTP suite. I don't know what Enviro and CManager is for. VTBuilder and Enviro worked but CManager did not. When I ran it, it spew out the following error:

          Warning: winsize 0 0
          Error: OpenGL version test failed, requires valid graphics context.
          The program 'CManager' received an X Window System error.
          This probably reflects a bug in the program.
          The error was 'GLXBadDrawable'.
            (Details: serial 816 error_code 130 request_code 128 minor_code 11)
            (Note to programmers: normally, X errors are reported asynchronously;
             that is, you will receive the error a while after causing it.
             To debug your program, run it with the --sync command line
             option to change this behavior. You can then get a meaningful
             backtrace from your debugger if you break on the gdk_x_error() function.)

          1. VTBuilder

          a. cd to TerrainApps folder
          b. issue the following command in a terminal

          sudo make VTBuilder
          

          c. cd to the VTBuilder folder
          d. run VTBuilder with

          ./VTBuilder
          

          2. VTP

          To build the VTP suite

          a. cd to TerrainApps folder
          b. issue the following command in a terminal

          sudo make
          

          c. cd to the Cmake, Enviro, and VTBuilder folder
          d. run the apps in the same manner as above

          Update: SETTING ENVIRONMENT VARIABLES SYSTEM WIDE

          1. Put this in /etc/environment file after PATH="/usr/local/sbin:/usr/local/bin:/usr/sbin:/usr/bin:/sbin:/bin:/usr/games"

          GDAL_DATA="/usr/share/gdal16"
          PROJ_LIB="/usr/share/proj"


          2. LD_LIBRARY_PATH

          a) create /etc/ld.so.conf.d/*.conf e.g.
          sudo touch /etc/ld.so.conf.d/*.conf

          b) open *.conf in gedit
          sudo gedit /etc/ld.so.conf.d/*.conf

          c) enter the following in *.conf

          /home/dilis/OPT/vtp/TerrainSDK/vtdata
          /home/dilis/OPT/vtp/TerrainSDK/vtlib/vtosg
          /home/dilis/OPT/vtp/TerrainSDK/xmlhelper
          /home/dilis/OPT/vtp/TerrainSDK/vtui
          /home/dilis/OPT/vtp/TerrainSDK/unzip
          /home/dilis/OPT/vtp/TerrainSDK/minidata

          d) run
          ldconfig -v
          in a terminal

          that's all there is to it. Now you can double click on VTBuilder and it will open.


          Have fun,

          Roel Cantada
          http://matangdilis.blogspot.com

          update: April 1, 2011, Enviro screenshots. Enviro is looking for a terrain, but I don't know what it is. As you can see the earth view shows only a blank sphere.


          Friday, October 15, 2010

          How to visualize Philippine GIS data in OpenSim

          Here is how I was able to terraform the OpenSim server using elevation data for the Philippines.  I will document the procedure here.

          **Software needed**

          1. VTBuilder http://www.vterrain.org/Doc/VTBuilder/overview.html (Windows)
          http://vterrain.org/dist/VTBuilder_090826.exe
          (Note: The vtbuilder listed here only works with Windows. But the VTP software suite can be compiled in Linux. I'll post on that later on.)

          2. L3DT Standard Edition http://www.bundysoft.com/L3DT/downloads/standard.php
          (Note: L3DT can run on Wine in Ubuntu)

          3. The Gimp
          4. Opensim Server
          5. Hippo Opensim viewer or Imprudence viewer
          6. Gimp Terrain http://dominodesigns.info/project/gimpterrain
          7. Blank SL raw terrain file - available with terrainerizer script http://stringofbits.net/terrainerizer/

          **Elevation data**

          1. DTED Philippines GIS Data Depot http://data.geocomm.com/catalog/RP/datalist.html
          2. ETOPO1 Global Relief Model  www.ngdc.noaa.gov/mgg/global/global.html

          **Procedure**

          //Preparing geospatial data for 3D visualization//

          DTED data in VTBuilder


          1. Import elevation data in VTBuilder
          2. Use the Area Tool to select the Philippines
          3. In the Area Tool menu open the Match Area and Tiling to Layer dialog
          4. Set Tile LOD0 Size:  to 256
          5. Now open the Area Tool->Merge and Resample Elevation dialog
          6. Select To file and fill in the path to filename of .bt file
          7. Click ok to write the .bt file
          8. Close VTBuilder

          ETOPO data in VTBuilder


          //Preparing the PNG heightfield map//

          L3DT Screenshot

          1. Open L3DT and import the .bt file
          2. Calculate the other maps (I found the water map useful for masking sea level elevation)
          3. Clip unknown data via Operations→Heightfield→Clip heightfield. Set to  Clip below and To height to something like -100.  Unknown data will result into an abyss in OpenSim where the avatar may fall endlessly until it is regenerated in the home position.
          4. Export heightfield map, and for the DTED elevation data, export the water map as .png files.  These maps should have a size of 2048x2048 pixels.
          5. Close L3DT


          //Preparing the SL raw files//

          //Additional image editing for DTED files//

          The DTED elevation data had sea level as the lowest elevation.  This results in the entire region being dry land and no ocean.  I needed to lower the sea level so that there will be oceans in OpenSim.  To do this I turned the water map into a mask in the Gimp.
          1. Open the water map .png file in the Gimp.
          2. Color select ocean.
          3. Create new layer with alpha.
          4. Copy and paste color selected ocean.
          5. Bucket fill with black (html notation 000000)
          6. Delete the original water map layer
          7. Open the heightfield map
          8. Copy and past the mask over the heightfield map
          9. Save as .png file
          //Tiling the image (The pro version of L3DT can do this automatically)//
          1. Set Edit->Preferences->Default Grid->Spacing to 256 pixels height and width
          2. You'll need to restart Gimp for the change to take effect
          3. Open the heightfield .png image in Gimp.
          4. Enable the following
          5. View->Show Grid
          6. View->Show Guides
          7. View->Snap to Guides
          8. View->Snap to Grid


          The 256x256 grid should be displayed.  There will be 8x8 tiles.  Pull out guidelines from the ruler and match them exactly to the gridlines.

          Then Image->Transform->Guillotine. Gimp will open 64 windows of each tile.  You'll have to save each file.  The produced DTED tiles for my sample is shown below:


          //Creating the SL raw files//

          Install the Gimp Terrain plugin by copying the file_slraw.py file to your Gimp plug-ins directory.
          Open the blank.raw file that comes with terrainerizer.

             1. Open your blank terrain file (blank.raw) and the heightmap in the Gimp.
             2. Using the Rectangle Select tool, select a 256×256 pixel section of the heightmap, starting in the upper-left corner.
             3. Click Edit -> Copy
             4. Select the terrain file and make sure the Height layer is selected.


             5. Click Edit -> Paste. You should see the section of the heightmap you copied appear as a floating layer.
             6. Click Layer -> Anchor Layer. The Height layer should now look like the copied portion of the heightmap.
             7. Click File -> Save As and save this file as a new file with the .raw extension.

          Now, repeat this process for every 256×256 pixel section in your original heightmap."

          Close The Gimp.


          //Preparing the adjacent multiple region in OpenSim//


          In the OpenSim server console issue these commands for every region

          create region RegionName

          It will ask for some information, the following are important.

          • location
          • port address
          • master avatar firstname, lastname and password


          The map above list the location (in red) and port numbers (in blue) for each Etopo tile:


          It grows eastward and northward, as the reference increases. e.g.

          • x, y
          • 1000, 1000 - origin region
          • 1000, 1001 - north
          • 1001, 1000 - east


          //Uploading the raw terrain files to OpenSim//

          Issue the following commands in the OpenSim server console

          change region RegionName
          terrain load /path/to/xxx.raw
          terrain multiply 0.2
          terrain elevate 18.75
          terrain bake
          terrain save xxx.raw
          

          0.2 and 18.75 are numbers for the DTED data.  The ETOPO data required terrain lower 164.5 and there was no need to multiply it.
          Saving the terrain makes sure all the modifications are in the raw files.

          //Editing terrain in OpenSim//

          This is not a 2d drawing in OpenSim but the generated Philippine map based on the data.


          Run the Hippo Openmetaverse viewer (or Imprudence viewer).
          View the terrain.  Fly around.
          I've noticed a problem with sea level land like Central Luzon and Manila which are flooded.  (How do they keep these places dry? dikes?).  There are also problems with inland lakes like Taal lake and Lake Lanao.  These are above sea level and will appear dry.  I would probably need prim water for these lakes.

          Comparison of ETOPO and DTED data visualization in OpenSim

          DTED Laguna
          ETOPO Laguna
          DTED Corregidor Island
          ETOPO Corregidor Island


          In my opinion the DTED data is best for land above water, while the ETOPO data is best for undersea land. Rivers are not seen in the ETOPO data.
          The DTED data is very rough compared to the Etopo data.

          To edit the terrain, click on Build and then Terrain (Bulldozer icon).  Lower, raise smooth whatever needs editing.  Remember you can always reload the raw data in the server if things get too ugly.

          OpenSim as a visualization tool for GIS data will not only be useful for teaching geography at a distance but may also be useful for GIS training and geology.


          **References**

          Amante, C. and B. W. Eakins, ETOPO1 1 Arc-Minute Global Relief Model: Procedures, Data Sources and Analysis. NOAA Technical Memorandum NESDIS NGDC-24, 19 pp, March 2009. Available at http://www.ngdc.noaa.gov/mgg/global/global.html

          Are these data and images copyrighted?
          No, all of our data and images are in the public domain, unless specifically marked otherwise - with the notable exception of trademarks, logos, and trade names such as the NOAA emblem and the Department of Commerce seal which are the property of the U.S. Government and are trademarks of the Commerce Department and require permission for use. All other images, and data, are available for your use. We would appreciate a link/credit/byline, as appropriate. For example:

              "Computerized digital images and associated databases are available from the National Geophysical Data Center, National Oceanic and Atmospheric Administration, U.S. Department of Commerce, http://www.ngdc.noaa.gov/."

          We also ask that you please cite the original data contributors and sources of funding when you use data from NGDC. As required by 17 U.S.C. 403, third parties producing copyrighted works consisting predominantly of the material produced by U.S. government agencies must provide notice with such work(s) identifying the U.S. Government material incorporated and stating that such material is not subject to copyright protection.

          For more information, please see the NGDC disclaimer and copyright notice. http://www.ngdc.noaa.gov/ngdcinfo/privacy.html#disclaimer

          http://www.ngdc.noaa.gov/mgg/faq.html


          GIS Data Depot http://data.geocomm.com/catalog/RP/datalist.html
          All of the data available via the GIS Data Depot is free of a copyright.

          L3DT Standard Edition
          L3DT Standard is the freely available general-use version of L3DT.

          VTBuilder
          This software is entirely free to use and redistribute, with this license. http://www.vterrain.org/Doc/VTBuilder/license.txt


          Balthazar. Large 3D Terrain.  In B's World [Blog]. http://balthazarsin.blogspot.com/2007/09/large-3d-terrain.html.

          Balthazar. Digital Terrain Elevation Data. In B's World [Blog]. http://balthazarsin.blogspot.com/2007/09/digital-terrain-elevation-data.html

          Using L3DT. In OpenSim wiki. http://opensimulator.org/wiki/Using_L3DT

          Wiggins, P. (2009, September 8). Tutorial: Creating OpenSim terrain with Blender. In A Random String of Bits [Blog]. http://stringofbits.net/2009/09/tutorial-creating-opensim-terrain-with-blender/

          Marama, D. (2009, July 28). Second Life Terrain Import and Export for The Gimp. http://dominodesigns.info/project/gimpterrain
           
          Creative Commons License
          This work is licensed under a Creative Commons Attribution-Share Alike 3.0 Unported License.